The instructions on this page are intended for users who are creating their project using the most recent PowerPoint release (16.14.1).
To get started:
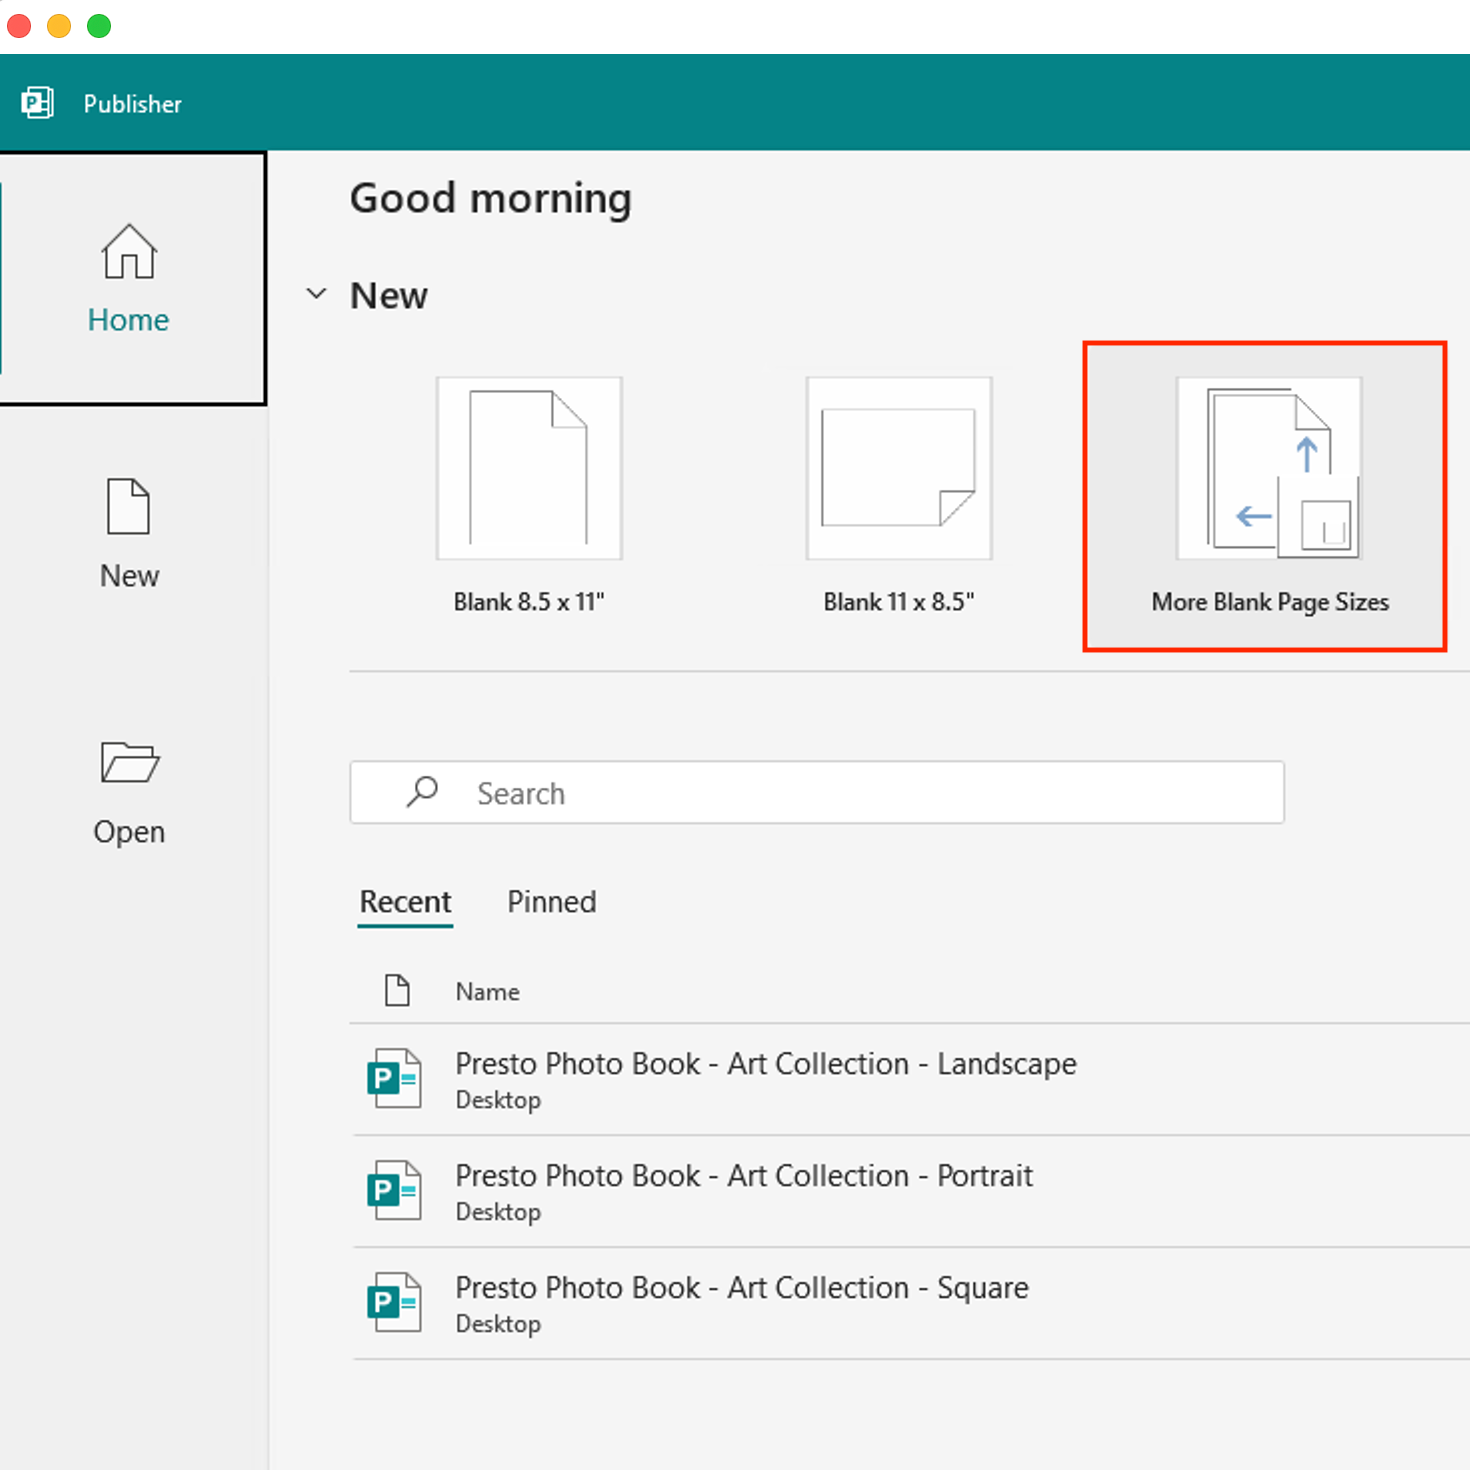
Open Publisher
Select "More Blank Page Sizes"
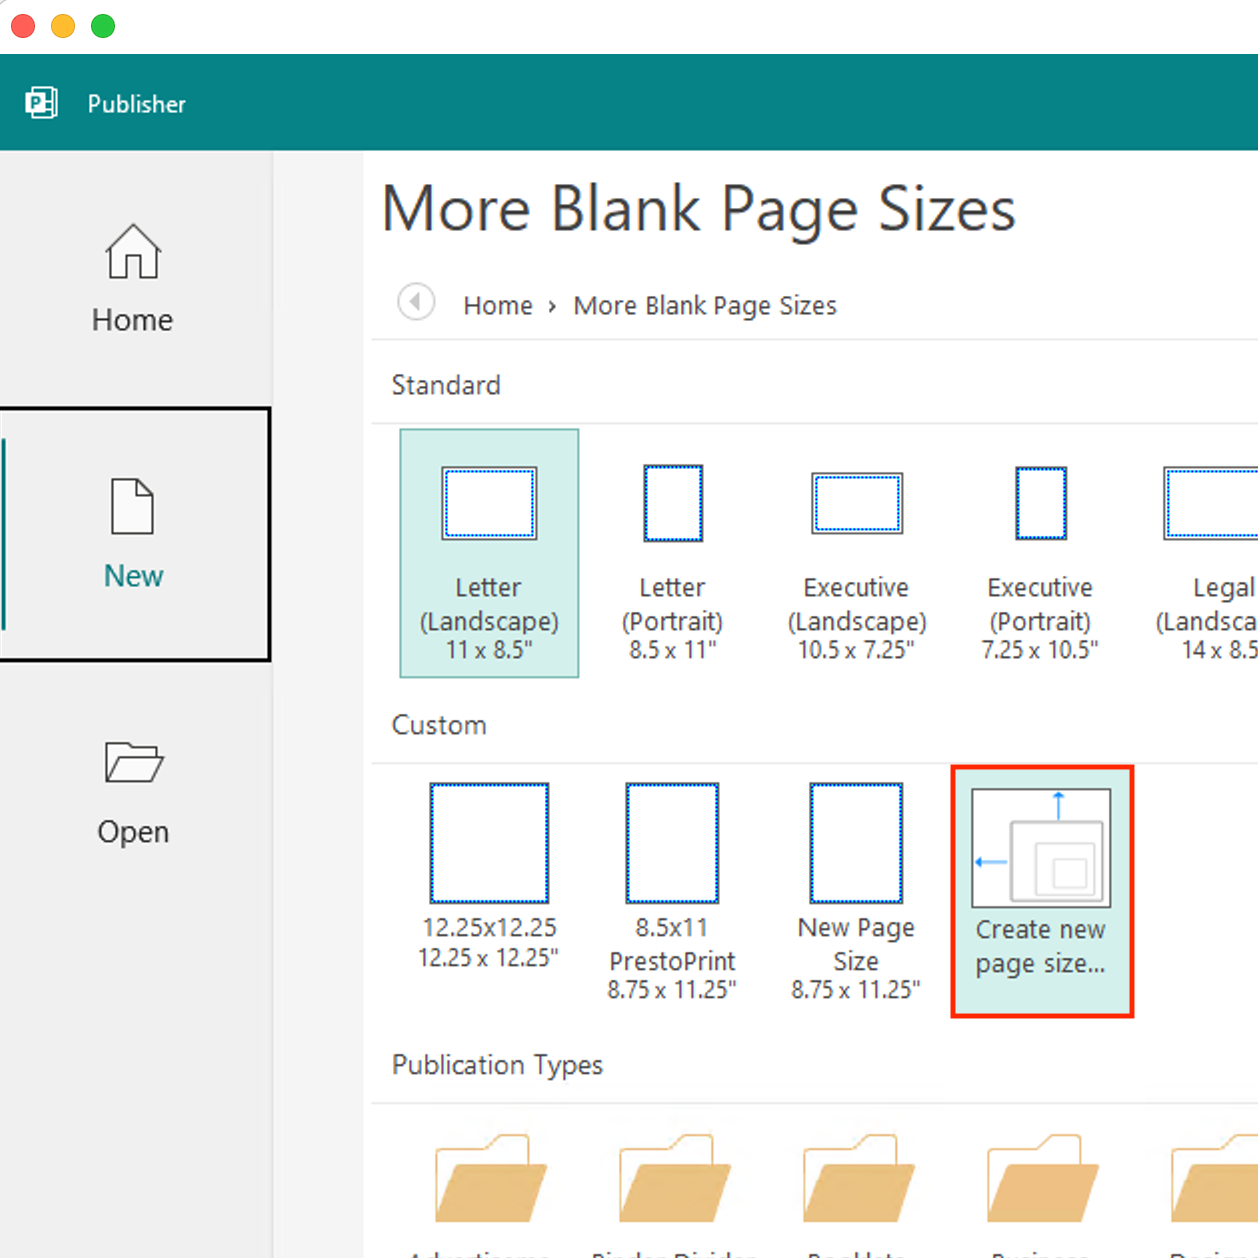
Select Custom > "Create new page size"
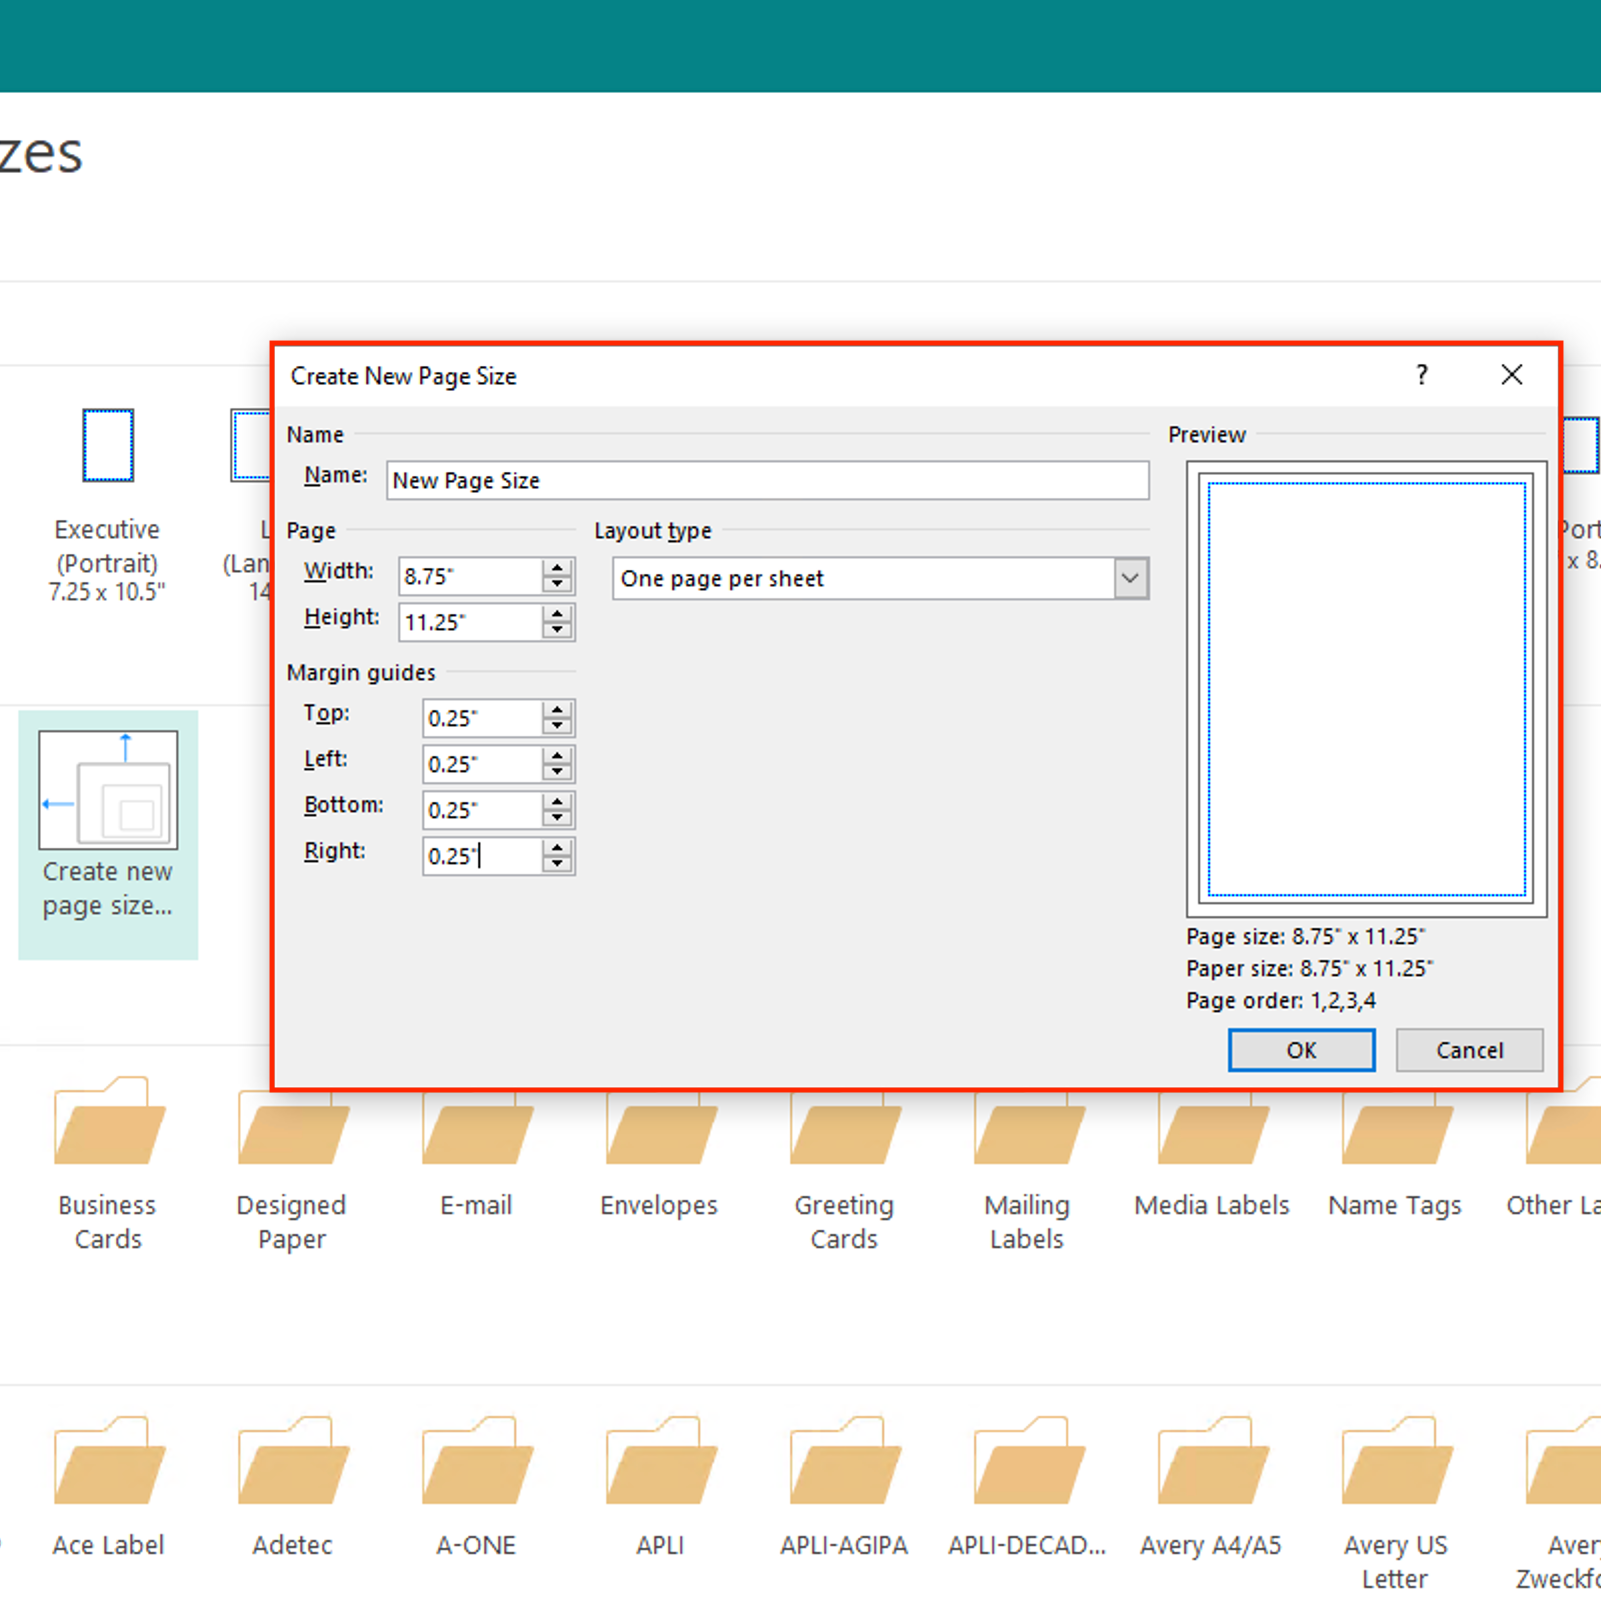
Change the name to the desired book size to easily find the page size option
Set the page width to the desired book size + .25 We suggest creating your file at .25” larger than your intended print size. Example: If you’re wanting to print at 11”x8.5”, enter the page size as 11.25”x8.75”.
Set the Margin guides to .25 on all sides and click "Ok"
You have now created a custom size and can click the page to start a new document
You’re ready to start designing!
Designing and Editing your Project
Designing your project is where you get to let your creativity shine! There are no rules, we just ask that you keep our crop guides in mind when designing so that your project is in tip-top share for printing. You can learn more about setting up your project for success on our Cropping and Bleed page.
Let's get designing!
Select the “Layout” tab
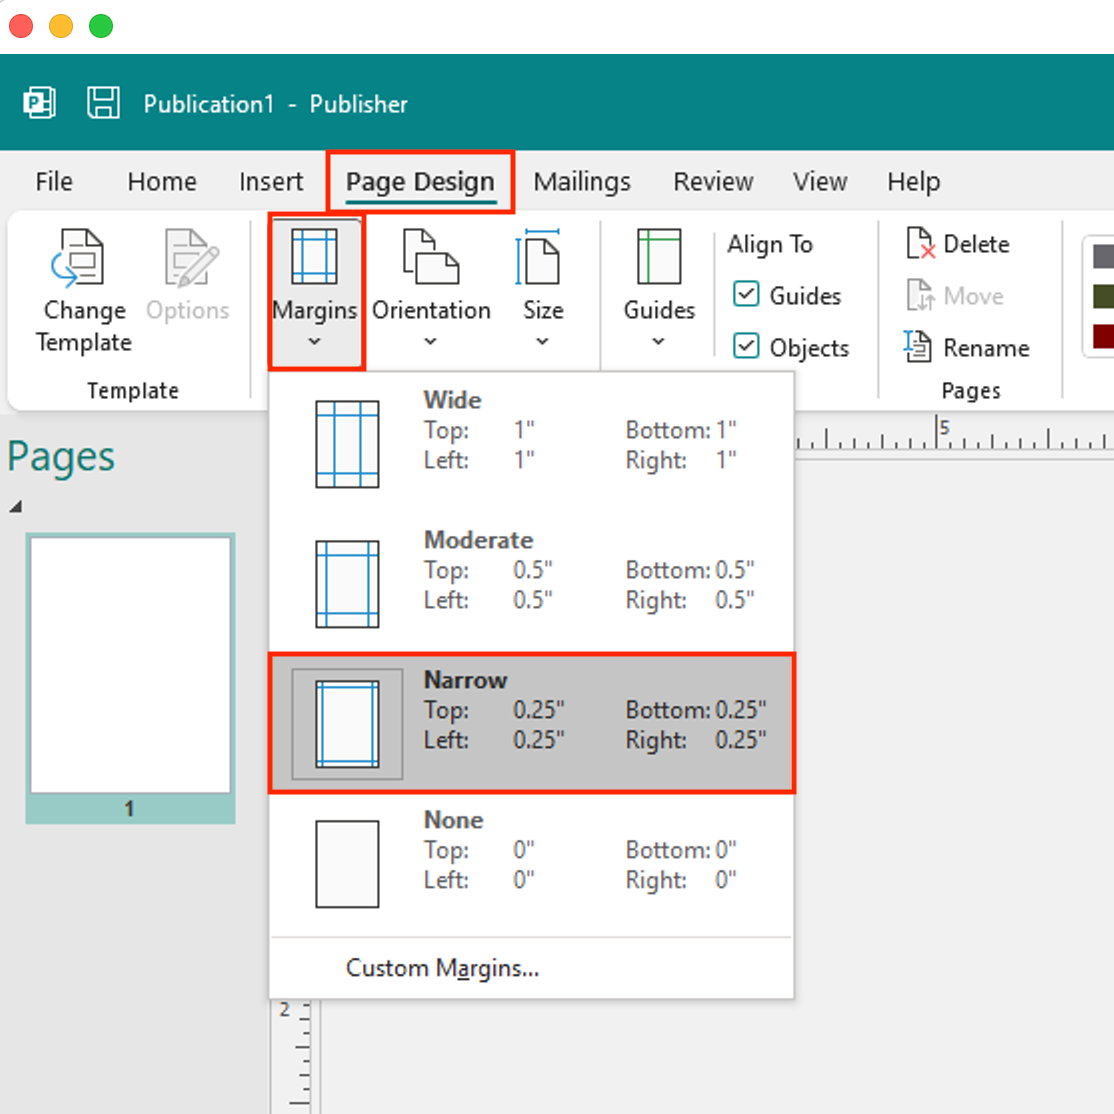
Select the “Margins” button
We suggest selecting the “Normal” or “Narrow” margin options. (if you did this during setup you can skip this step!)
You can start designing by using the “Insert” or “Design” tabs! Please Note: We suggest designing your file with Page 1 as the Front Cover and Page 2 as the Back Cover. You’ll be able to specify where these covers are when you upload your file to our site!
Make sure you’re designing with your minimum and maximum page counts in mind. You can find details on all of our products on our Product Catalog.
Exporting your Project as a PDF
File > Save As
In the dropdown menu, select “PDF”
Make sure the "Optimize for:" section says “High quality printing”
Click “Save”
You have now successfully set up your project in Microsoft Publisher!
Please Contact Us with any questions you may have about creating in Publisher!